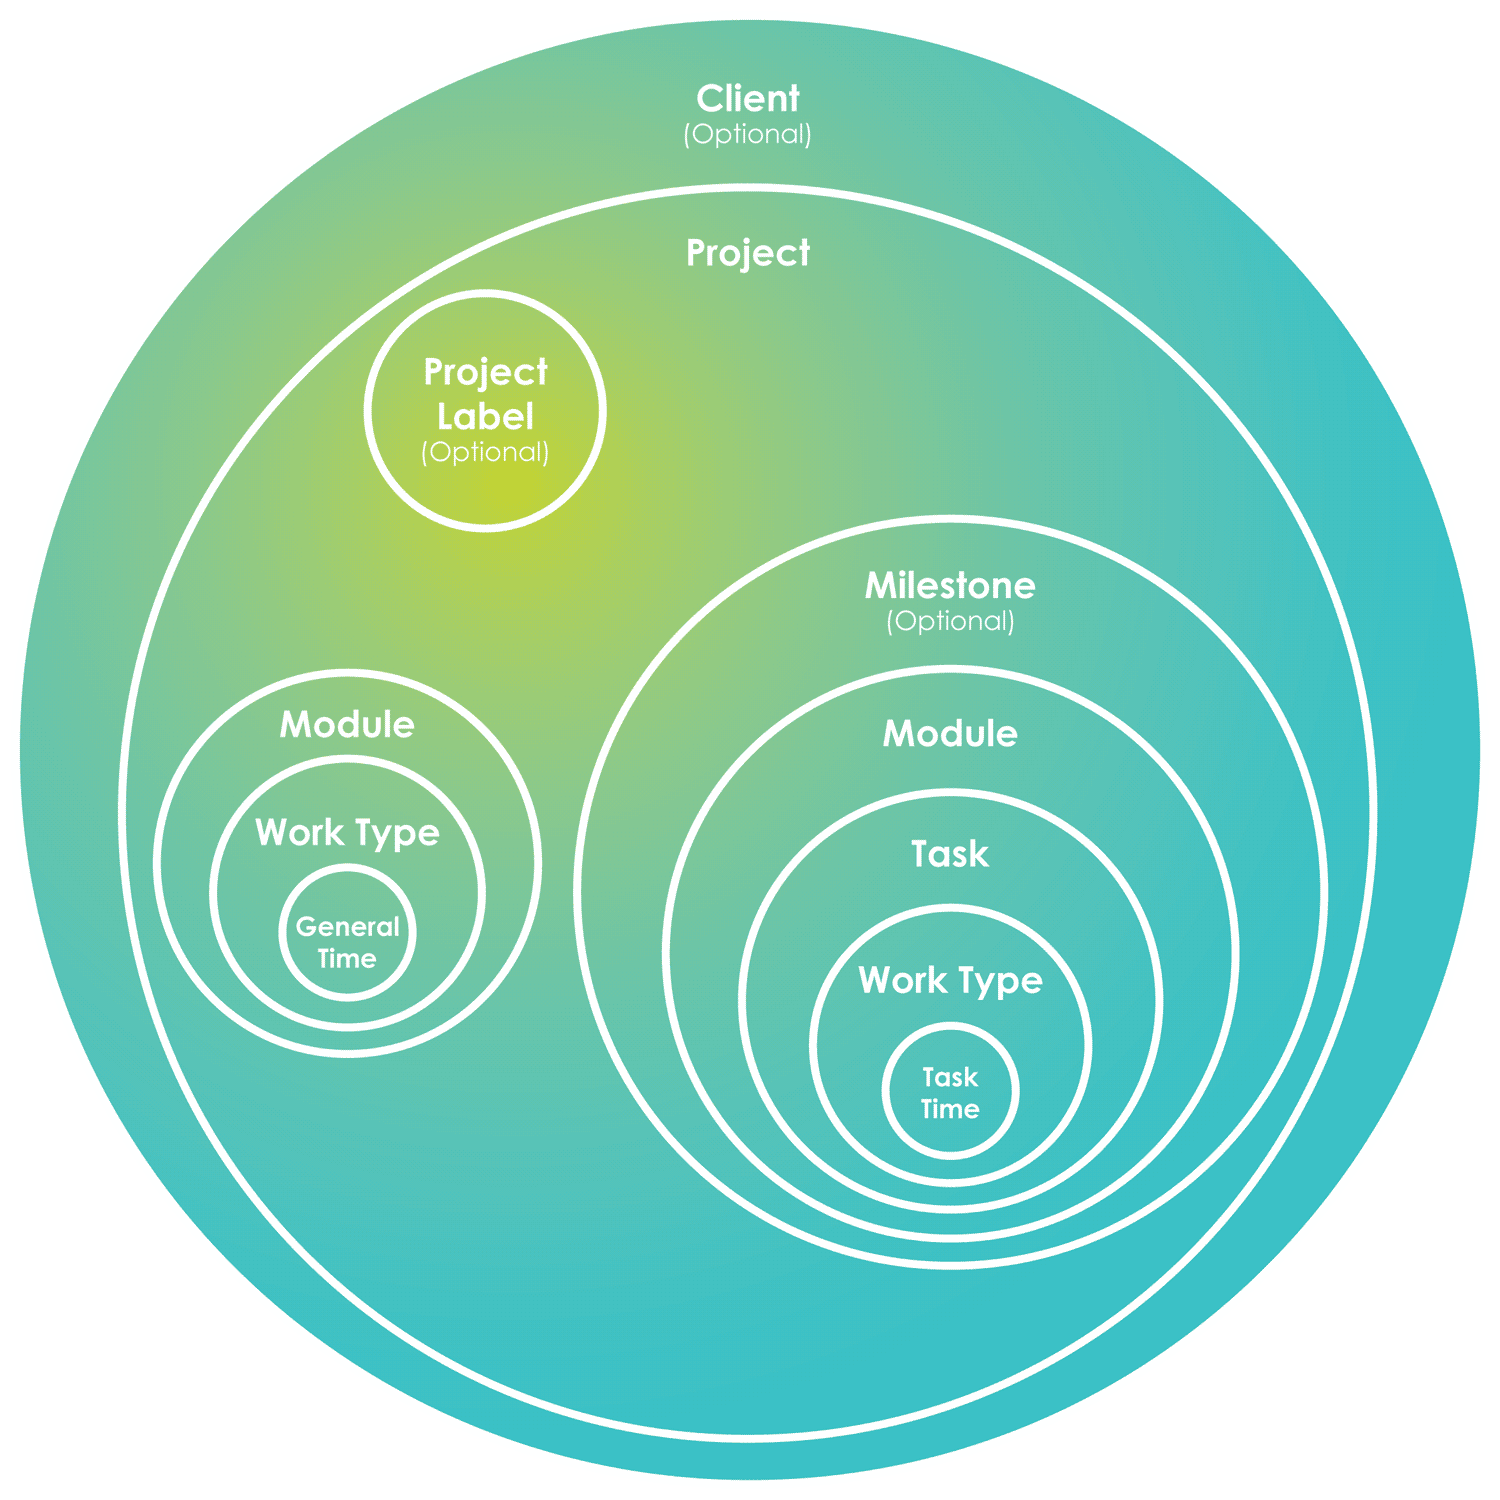
Intervals’ project hierarchy starts with the Client and then moves into Projects, Milestones, Modules, Tasks and then Work Types. Here is a high-level relationship project management diagram that shows the hierarchy of elements:
Clients
When you first create your account you have an option to create your own company as a client. We recommend this because you can easily track internal projects as well as client projects. This is very helpful in reporting. The client can provide high level information about the client such as total work done in projects for the life of the client.
Projects
This is the heart of Intervals as it holds everything that is required to run a project. Only manager level users and administrators can be project managers for projects. The pricing model reflects how many projects you’re able to have on your current plan. Inactive projects do not count against your project total.
Administrators can automatically see all projects. All other user levels need to be given access to each project. This is done via the user’s profile, or by the project’s team section.
Milestones
Milestones can be used to manage a multi-task deliverable. The milestone can be used to list the status of each task that is associated with it. They are completely optional and for our maintenance and retainer work we almost never use them but for our project work we almost always use them.
Milestones also have a scheduling component where future tasks and milestones can be rescheduled when a milestone is moved. Say for example the first deliverable runs late you can move the milestone and then move all of the upcoming milestones and tasks.
Modules
Modules are typically used for a phase of a project or for a feature being developed. They are buckets where time and tasks are attached for reporting and for management. To use a quick example say you have a task that is in a design module. You can run filters to see which tasks are in the design module as well as run reports on time for that module as well. If you don’t think you need to use modules we recommend creating one general module.
When adding time or creating tasks the general module will get auto selected since it is the only item in the drop down menu. If you need to expand and use modules later you can definitely do that. For us, we typically use more feature driven modules like ecommerce, admin tools, etc. This allows us to manage those features and run reports on the efforts in those areas.
Lastly, we typically use an “out of scope” module with client work and put any work that was not in the contract in that module. This allows you to quickly and easily show hours, tasks and the financial value of work that wasn’t in the original agreement.
Tasks
Tasks is where we perform most of our work and where we apply our time into. Though you can still use a project without tasks, you’ll just have less data to report from. The task has participants who get emailed any time something happens to the task. It also has all the information required for a resource to perform the task, including any attached task or project documents, time estimates and summary. If the task originated from a customer request (request queue), it will also have a copy of that in the comment history.
To create a task, firstly it requires a project, then it requires a module. There is not a way to have a task belong to more than one project. When assigning time to a task, every field will be pre-filled, except the work type. If you don’t want to use work types, just add a “General” work type and will automatically get selected when adding time.
Work types
The most common use for Intervals is billing clients for work performed. A work type is the type of work that is being performed for the client and includes an hourly rate associated with it. Work types are similar to Modules in that both have account defaults. These can be managed an administrator by going to Options >> Settings & Defaults >> Default work types.
When a new project is created, it will grab a copy of these defaults and the project will have those available when you apply time to that project. If a project requires a custom and unique work type, you can add it via the project profile, otherwise it it’s usable in future projects, we recommend adding it to the Settings & Defaults section.
