Modules are a powerful feature that enable you to segment your tasks into custom categories. After setting up the initial list of modules, each new project will contain a pool of those default modules that are available for tasks. As the project progresses, and more tasks are assigned, having them categorized by module makes for more powerful task list filtering and reporting.
What happens when a module is no longer needed? It needs to be deactivated. There are two different ways to deactivate a module, and the method you will use depends on how you plan to use that module going forward.
How to deactivate a default module
When a default module is no longer going to be used from now onward, it’s best to deactivate it from the Settings & Defaults section of your account. By doing this the module will still be available on existing projects and tasks, but any new projects you create will not include it.
Here are the steps for deactivating a default module:
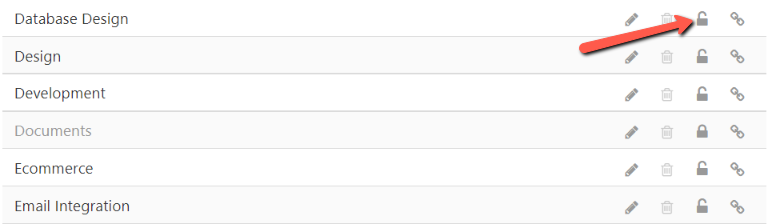
- Go to the gear icon ⚙ and click on Settings & Defaults
- Click on Default modules
- Click the padlock icon
 next to the module to be deactivated
Note: This will not deactivate the module on existing projects. Those projects will need to be updated individually using the steps in the next section.
How to deactivate a module on a project
When a default module should no longer be available on a project, deactivate it from the Modules section of that project. This will keep it from being used on any new tasks without affecting existing tasks.
Here are the steps for deactivating a module on a project:
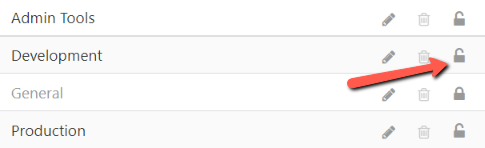
- Go to the Projects tab and click to view the project
- Click the Modules link in the left column
- Click the padlock icon next to the module to be deactivated