Intervals features project level permissions. This means any team member that has access to a project can see the tasks, project notes, and documents for that project.
Administrators by default have access to all projects, but manager, resource, and executive level users need to be granted access to each project. If a non-administrator level users does not have access to a project they will not be able to view it. Controlling project access can be done in two ways:
1. Edit Project Team Permissions
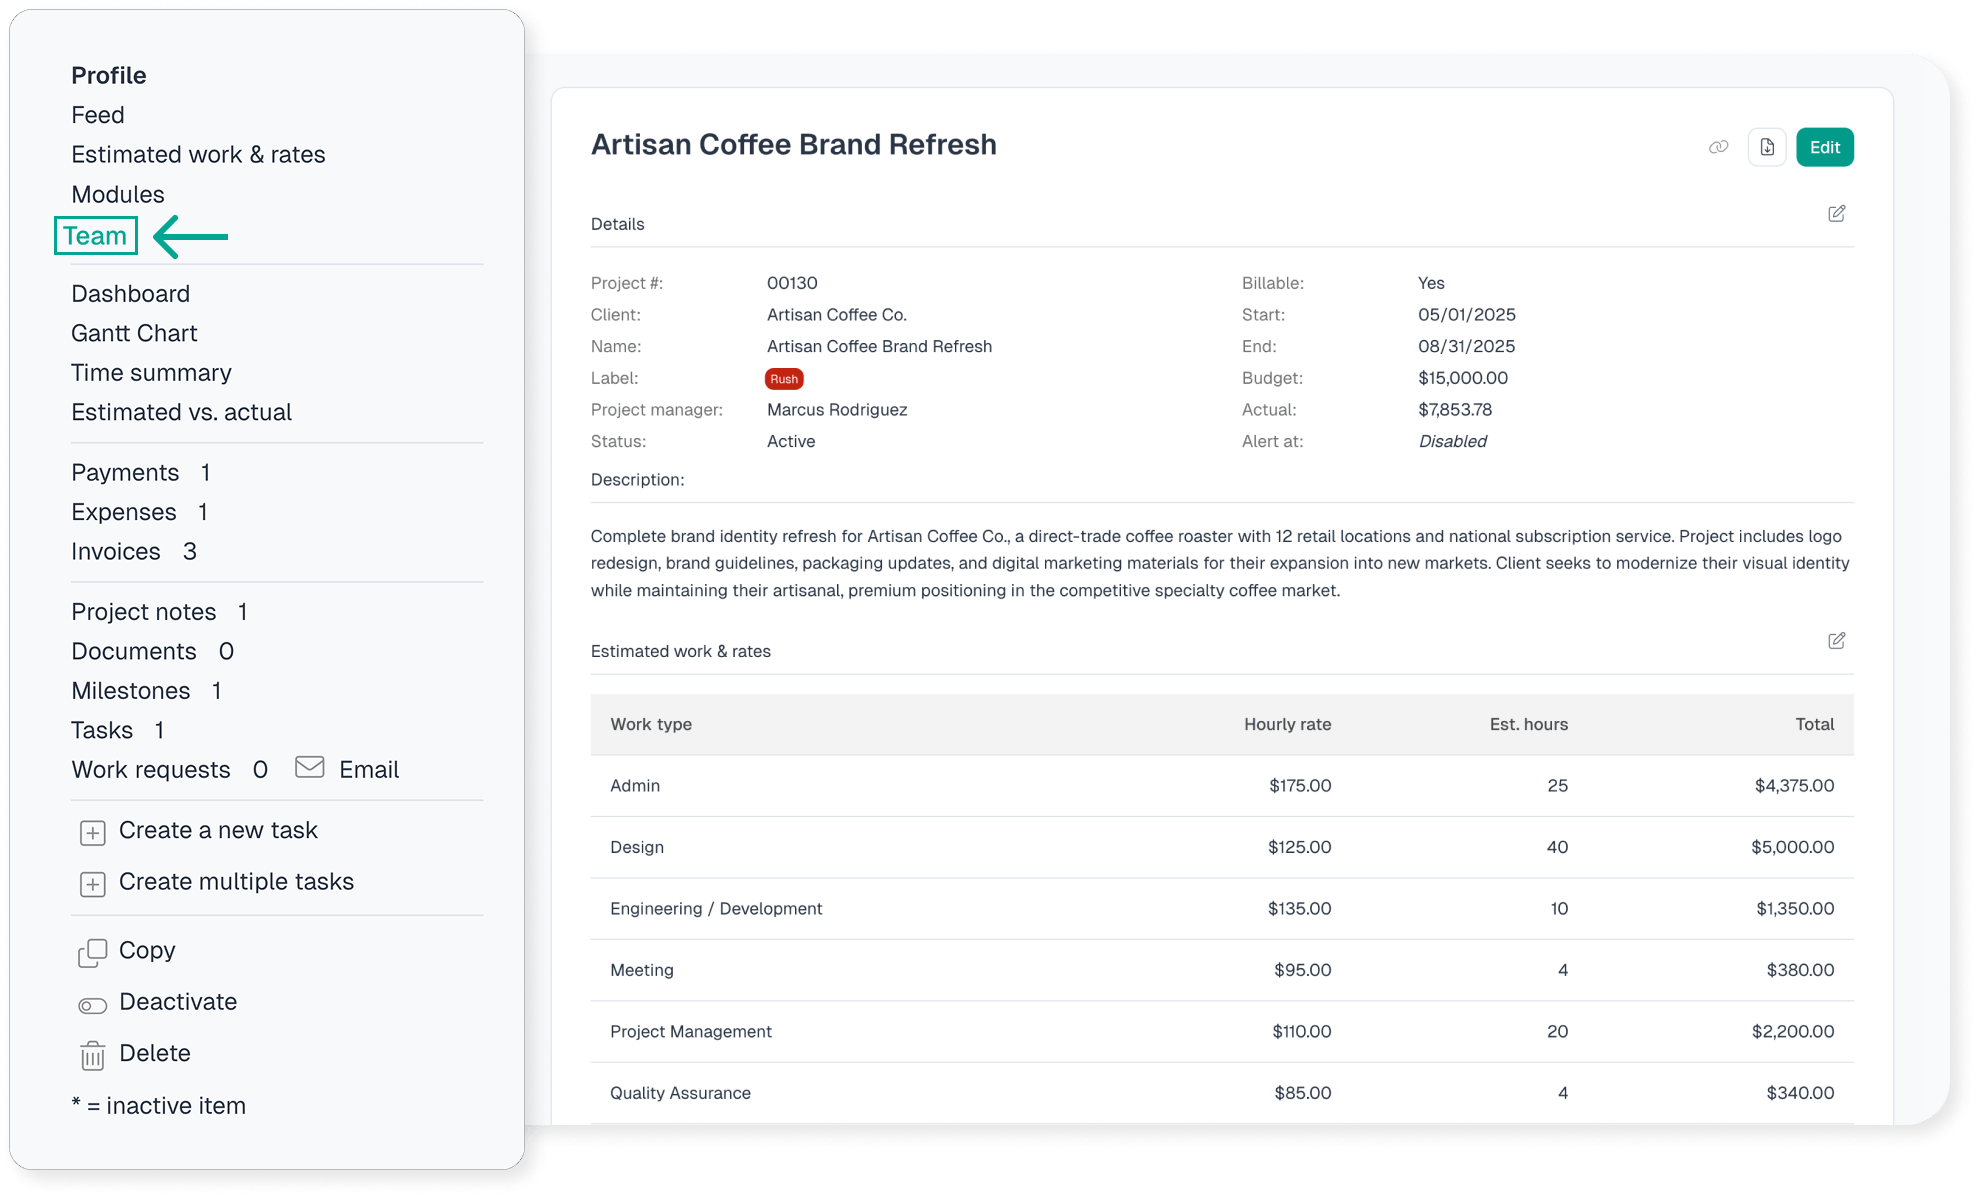
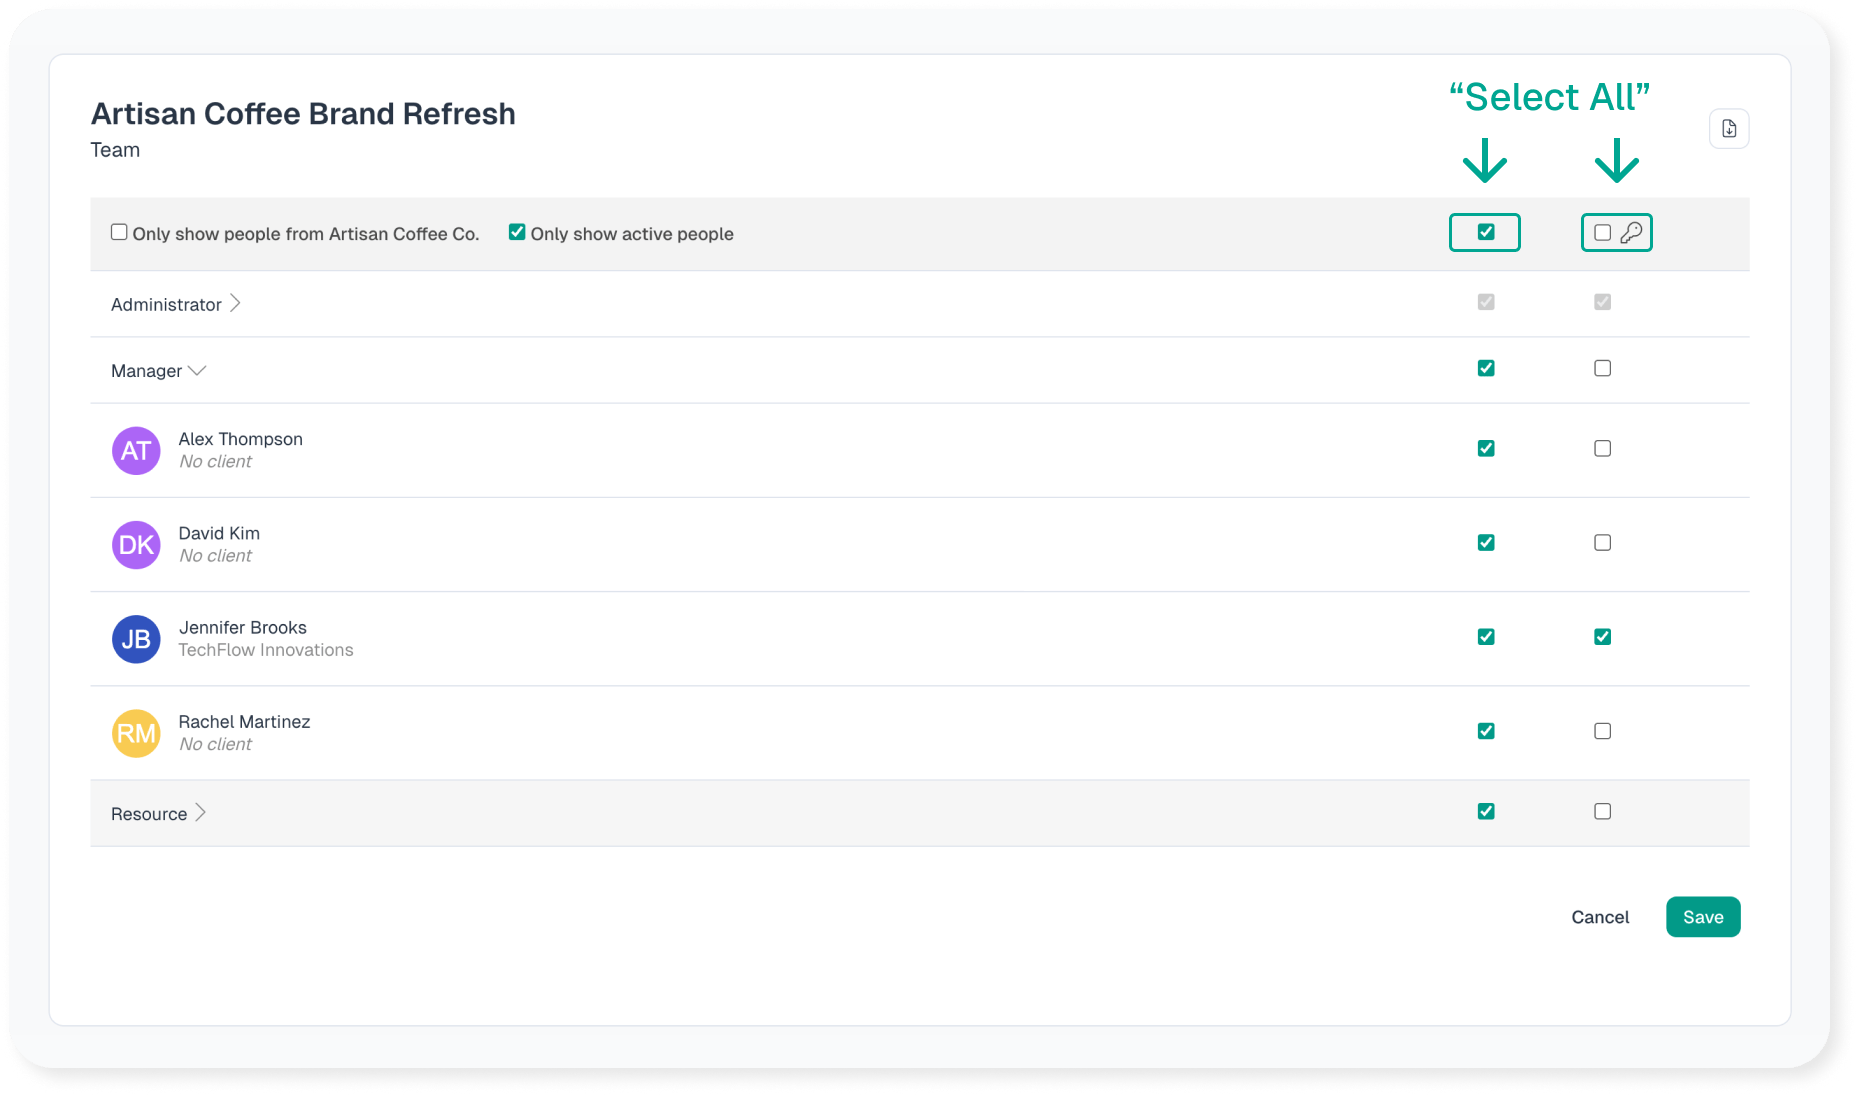
The list of people with access to the project can be found under the “Team” link in the left column of the project profile. Use this option to modify project access for multiple people at once.
This page provides the best option for adding all of the people on your team to a new project. To add everyone to the project at once, check the “select all” box above the first column of checkboxes. Then click Save at the bottom of the list.
The second column of checkboxes determines who has access to the secure notes for that project. A secure note is useful for storing sensitive information that only certain members of the project team should see. They are both private and encrypted.
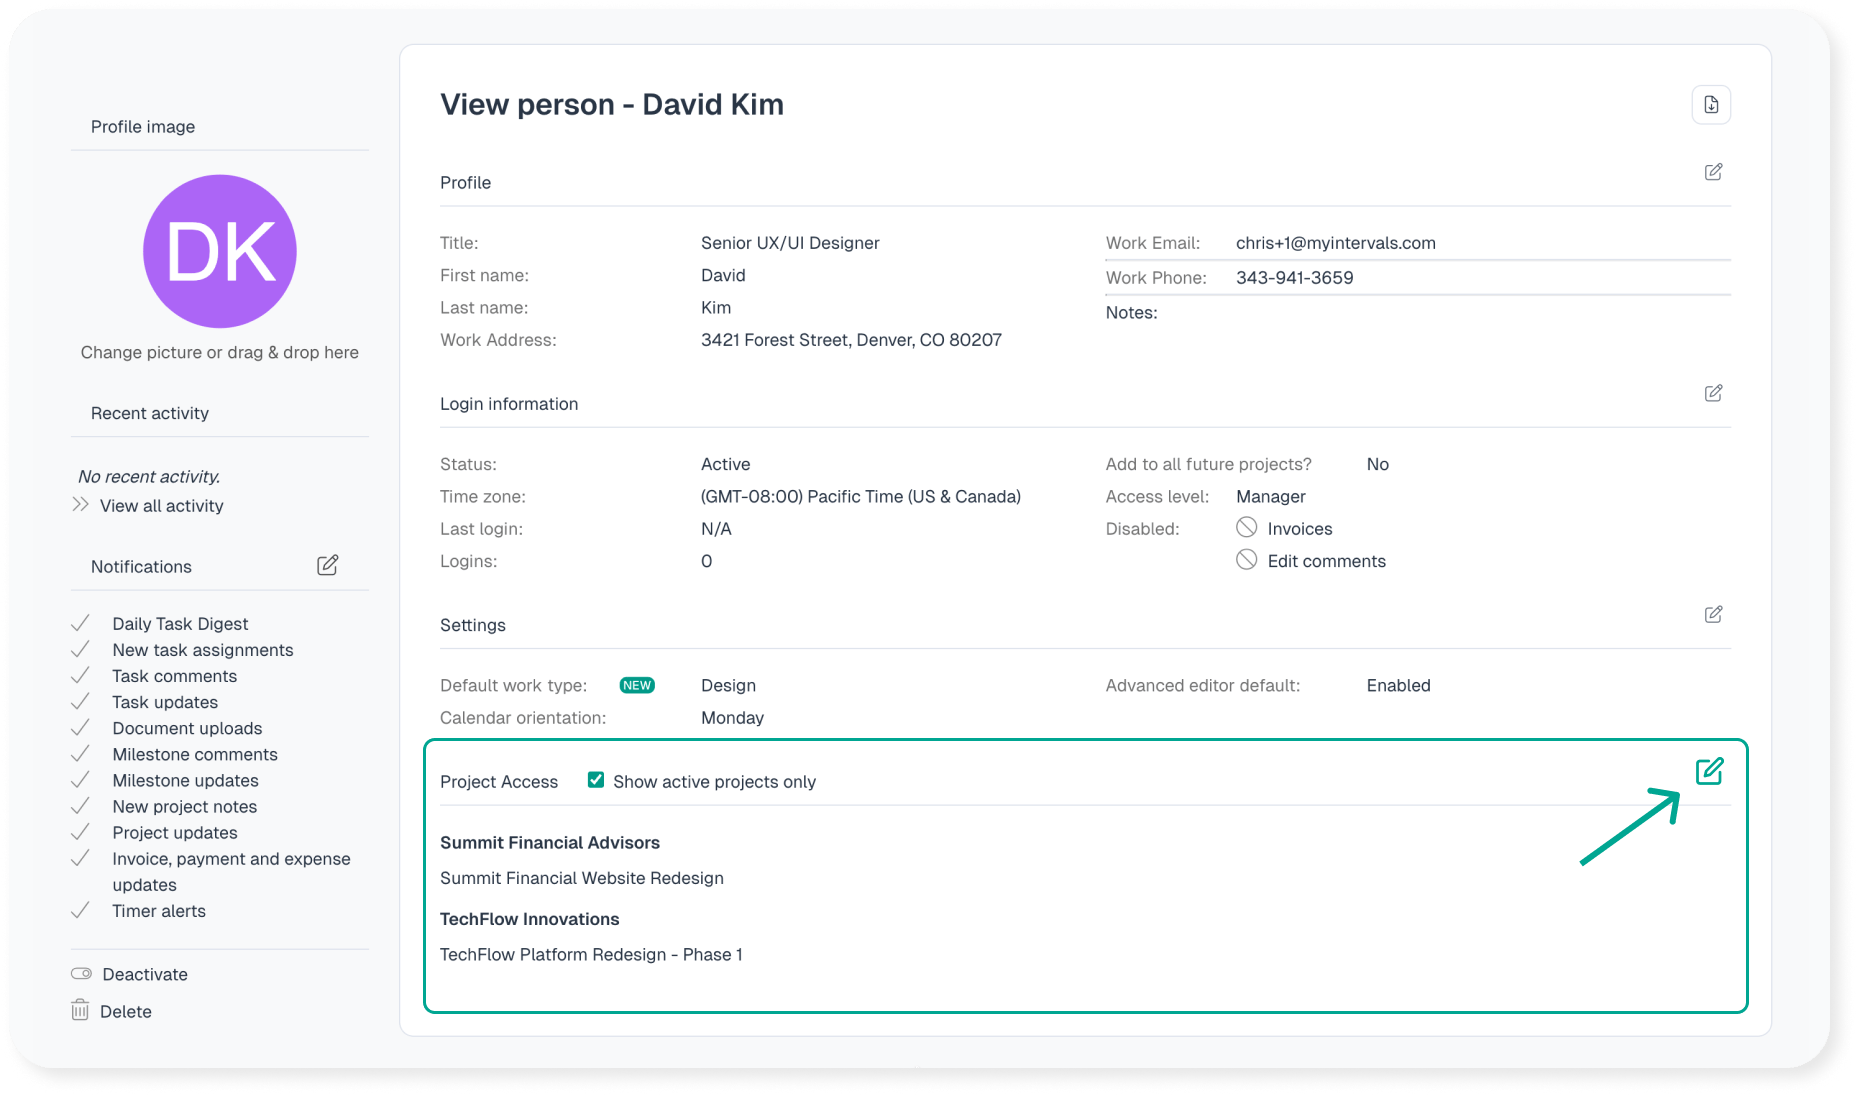
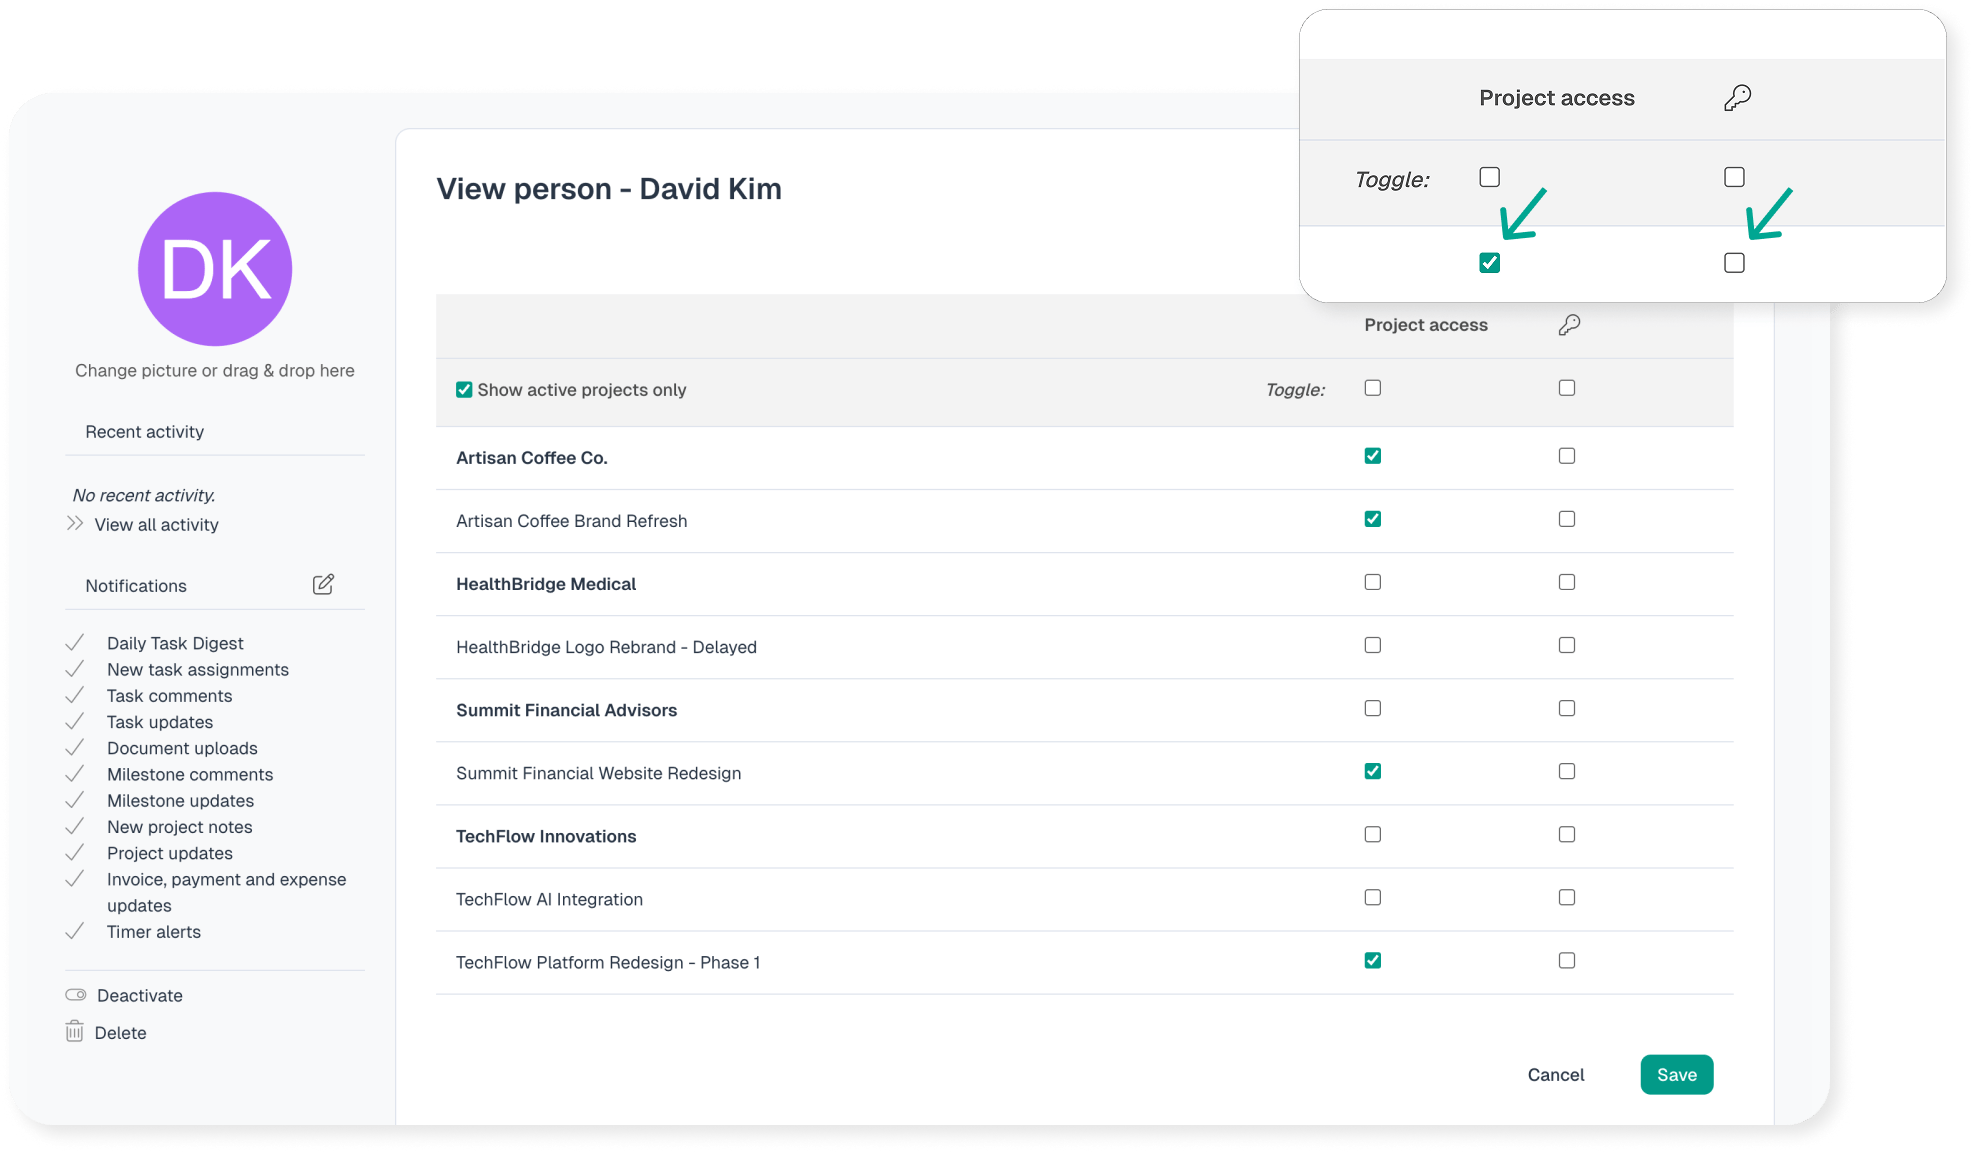
2. Edit “Project Access” on the user’s profile page
Use this method if you need to add one person to many projects.

When editing permissions, there are two check boxes for each project:
- The first is for project access, which essentially is a yes/no value for toggling access to the project.
- The second depends on the first check box being checked. It gives access to the secure project notes of the project.
If you grant this person access to the project they will have access to project notes by default but not to private notes. Think of it as public vs. private notes and as an added layer of protection for sensitive information. Secure notes are encrypted at the database level for added security.
There are some users, such as full time members of your team, who may need to be granted automatic access to any new project. Please reference the help article on utilizing the “Add to all future projects” feature for more information on this time-saving setting.


