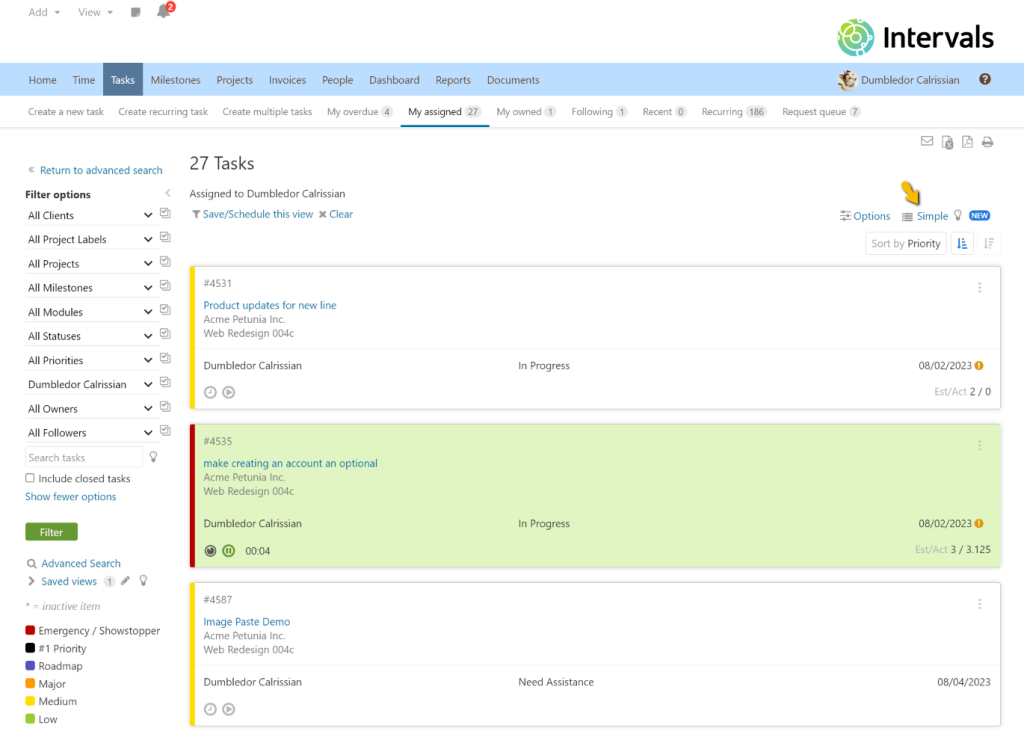
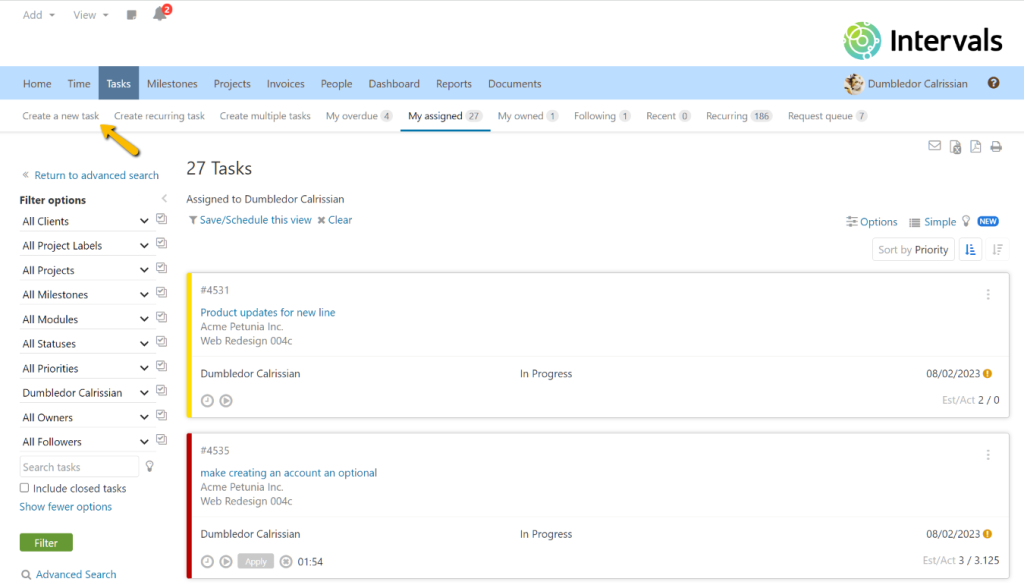
The task list page, found under the Tasks tab, provides three different views — the default table view, card view, and simple view. This help article explains the simple view and illustrates how to take advantage of its many features.
What is the simple view?
Like the default table view, the simple view includes the same comprehensive set of features for filtering and searching task lists. The primary difference is how the tasks are visually represented and managed.
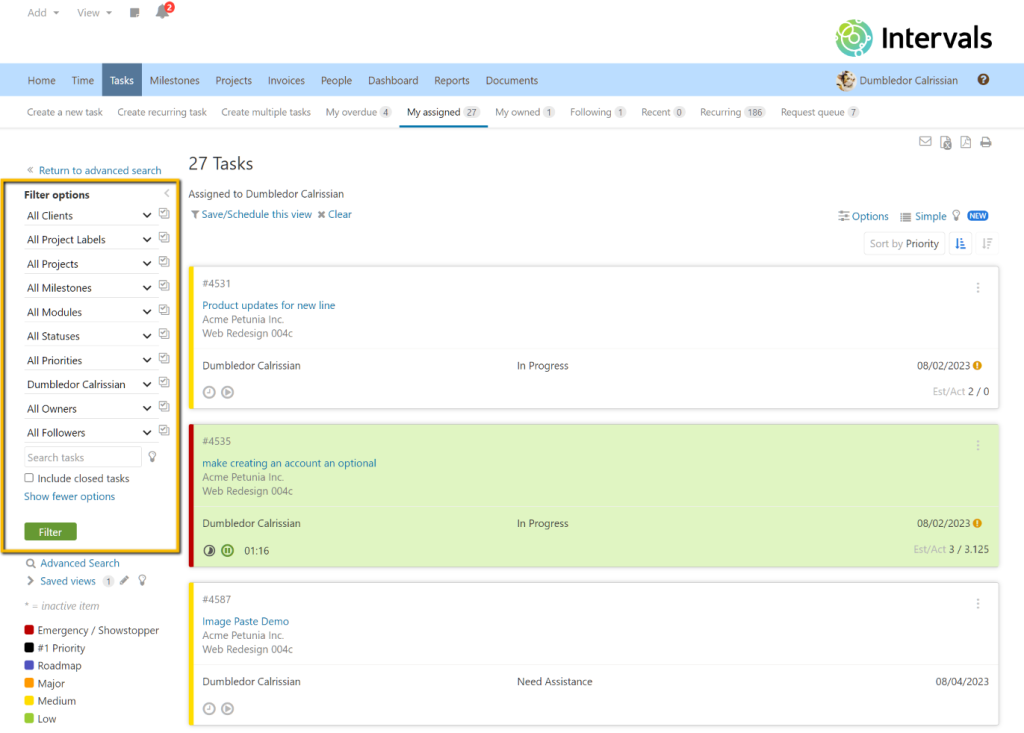
The simple view originated with the mobile app and displays tasks with a minimal amount of information. It is ideal for smaller screens or scenarios where less information is needed. Use the filter options in the left column to display a specific subset of tasks.
The benefit of the simple view is the ability to skim and update tasks quickly. It’s ideal for anyone who wants to experience a consistent interface between the mobile app, smaller screens, and the desktop.
How does it work?
The simple view of the task list includes tasks based on the filter settings in the left column. This is a minimal view of a task list, however, there is the option to display the summary of each task inline. To open a task, click its number or title.
By default, tasks are sorted by due date. If there are more tasks than the current settings will allow, the task list is paginated. The advantage to using the simple view is that it can be sorted so that the most relevant tasks appear at the top of the listing. Combined with its minimalist rendering, this makes it ideal for evaluating tasks.
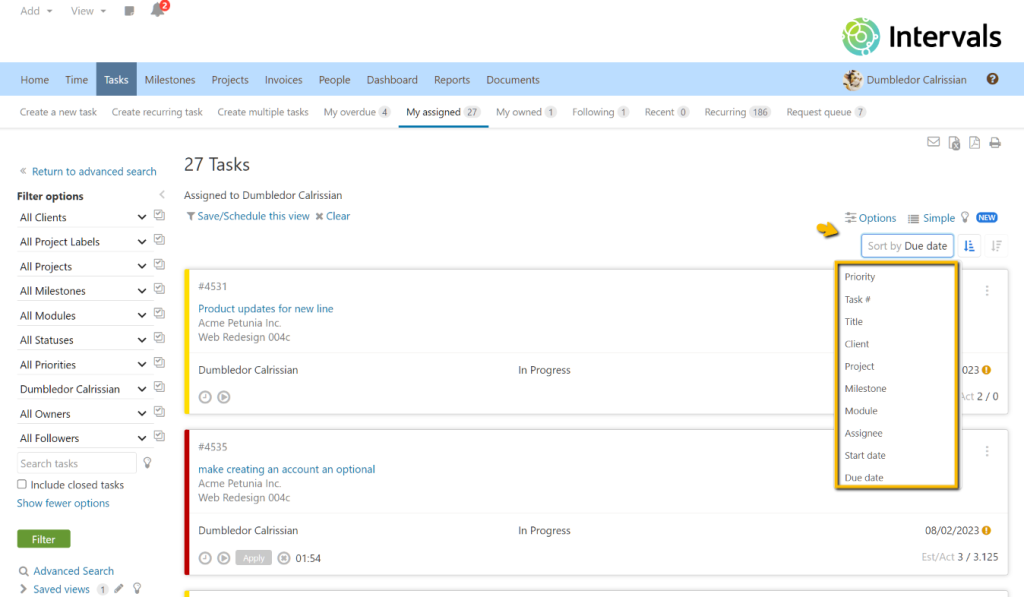
To sort the tasks, click the sort option located at the top right of the list. There are two additional buttons to the right that determine whether the tasks are sorted in ascending or descending order. If there are multiple tasks that meet the same sort criteria, such as assignee, tasks with the same assignee will be sorted secondarily by their due date in descending order.
How to change between task views
To change from one task view to another, click on the Table/Card/Simple icon in the right corner just above the task list. Select the desired view to refresh the task list. Don’t worry about losing your work in one view when switching to another. Intervals will remember your last state in each of these views separately, enabling you to toggle through views seamlessly while managing tasks.
How to sort the task list
The simple view can be sorted using the same criteria as the other task views. Click the sort option located at the top right corner of the list. There are two additional buttons to the right that determine whether the tasks are sorted in ascending or descending order. Tasks will sort in ascending order by default.
If there are multiple tasks that meet the same sort criteria, such as priority, tasks with the same priority will be sorted secondarily by their due date in descending order. For example, if there are several tasks with the same high priority, tasks due next will bubble to the top of that grouping.
How to filter the simple view
The filter options in the left column work the same as they do in card and table view. Select any combination of them to control which tasks are included in the list.
Intervals will remember the last set of filters for each of the task views. This enables you to work independently in each task view, so you can manage tasks in the simple view using one set of filters, and manage tasks in the card view with another.
How to save simple views
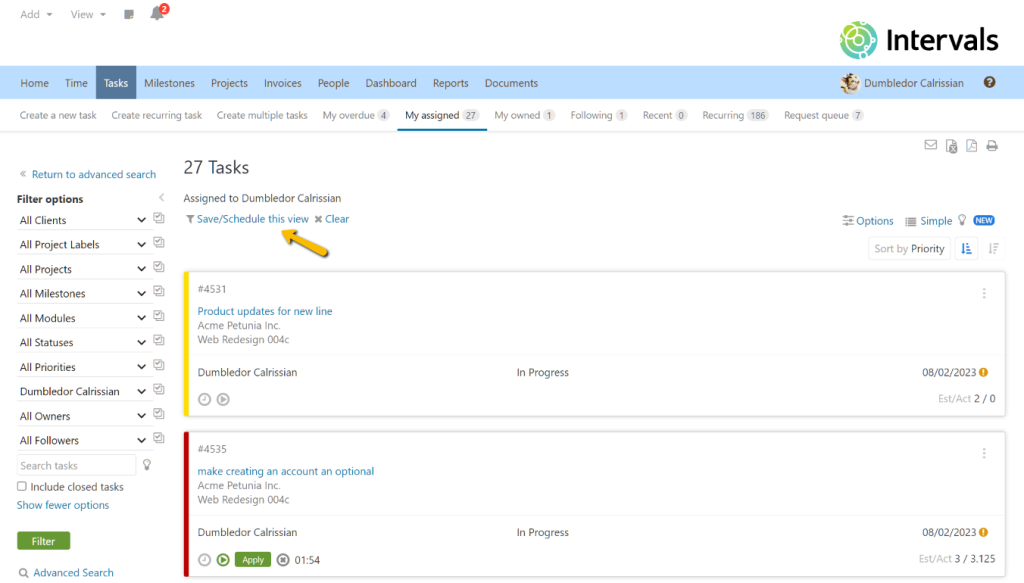
Any time a list is created using the filter and sort options it can be stored in your list of saved task views. These are the same saved views that are available in the card and table task list. Creating a saved view allows you to create multiple lists for managing different projects, milestones, and teams.
When the view is saved, Intervals also records the type of task list that was used. For example, if a view was created using a simple list, loading that saved view in the future will render the task list in that mode. Like other saved views available throughout the Intervals app, these can also be scheduled for recurring delivery.
How to create and update tasks
To create a new task, click on the “Create a new task” link in the task navigation bar at the top of the page. This option appears at the top of every page found under the Tasks tab. If the newly created task matches the current filter criteria, the list will be refreshed to include it.
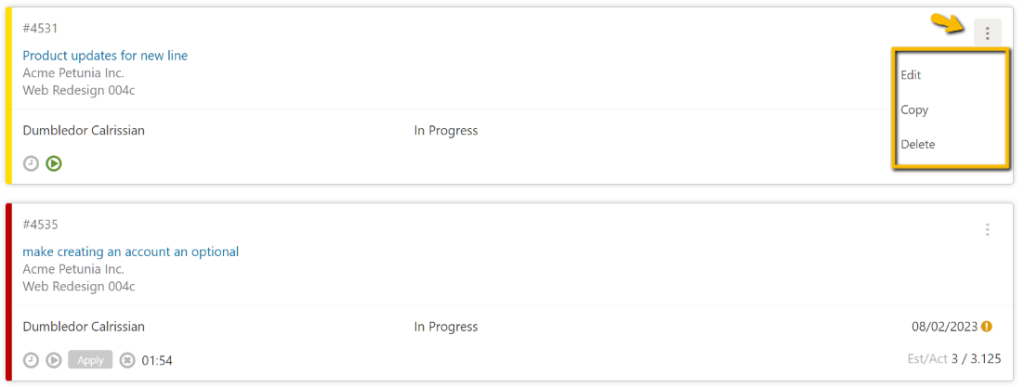
Tasks can also be updated from the simple view, just as they are in other views, by clicking on the menu icon in the upper right corner of each task. This menu can also be used to copy or delete a task.
Example use cases for the simple view
Reviewing tasks in a meeting
The minimalist rendering of the simple view makes it ideal for quick task reviews during a meeting. For example, a manager could pull up a list of tasks due that week on their tablet, then pass it around the room. Each person on the team would skim the tasks and share any helpful insights they have.
Custom lists
The ability to create custom task lists using the simple view makes Intervals an ideal task management application for smaller screens. Create and save custom lists for those times you find yourself away from your desk, but still at work. Here are just a few examples of custom lists using the simple view:
- Reviewing deliverables at client meetings
- Team standups
- Reviewing your day on the train to work
- Applying task timers at the end of the work day
- Focusing in on high priority tasks
