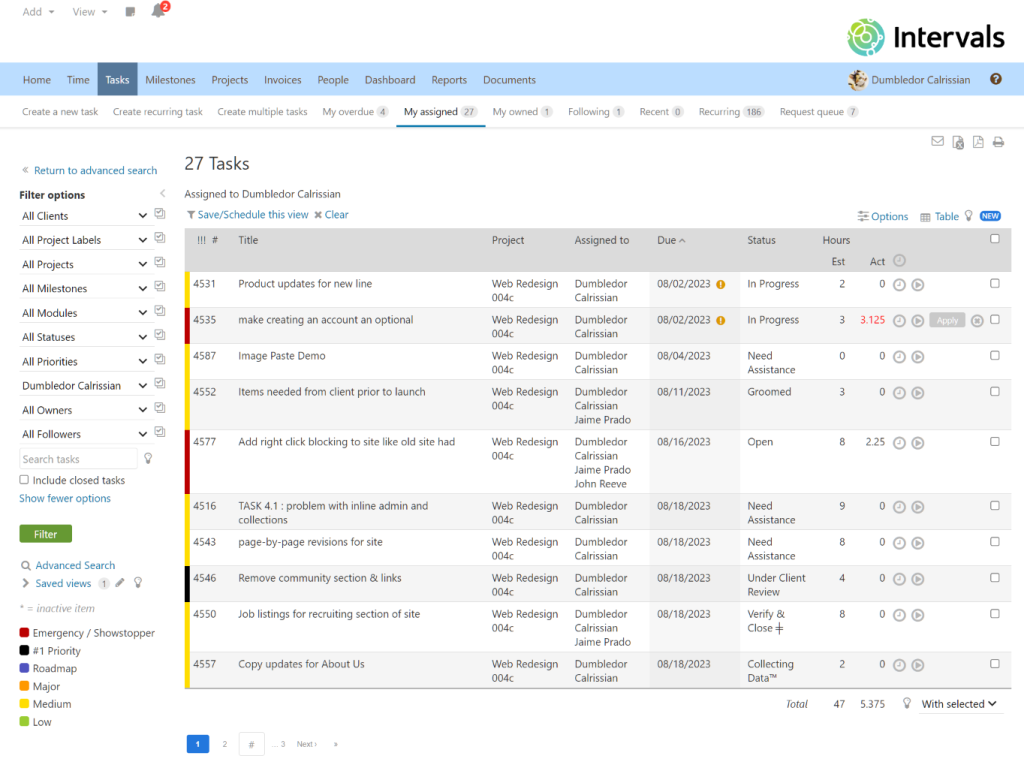
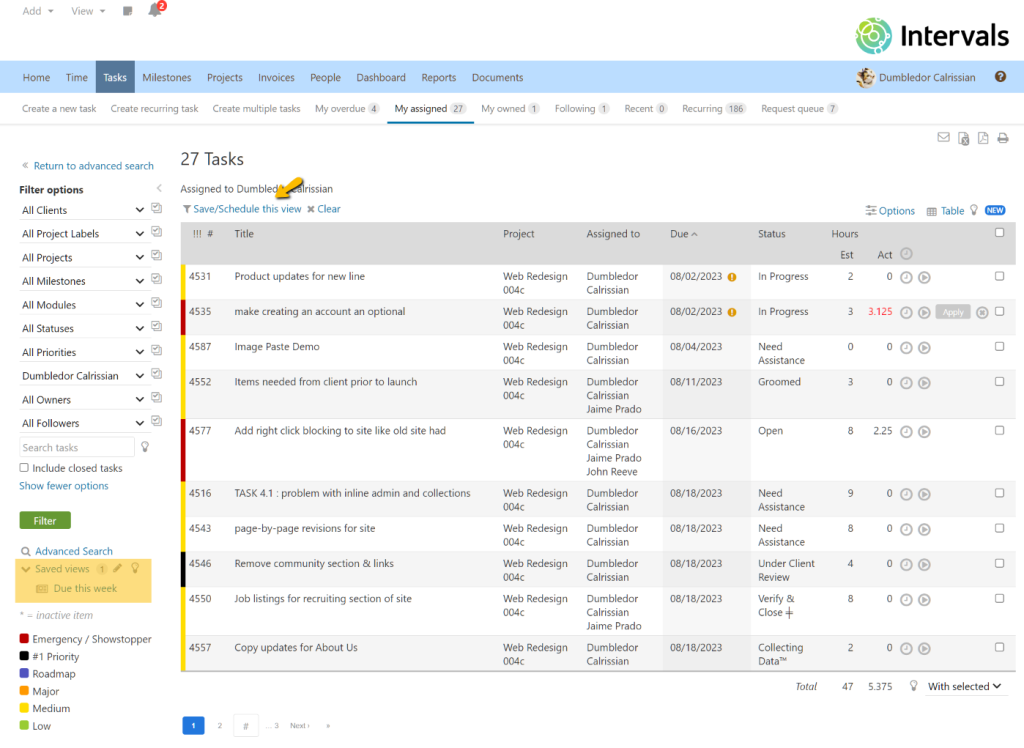
The task list page, found under the Tasks tab, provides three different views — the default table view, card view, and simple view. This help article explains the default task table view and illustrates how to take advantage of its many features.
What is the table view?
The table view includes a comprehensive set of features for filtering and searching task lists. The information displayed is similar to the other task views. The primary difference is how the tasks are visually represented and managed.
The task table view displays your tasks using a traditional tabular list similar to a spreadsheet. The list will include any tasks that meet the current filter settings. By default, tasks are sorted by due date. If there are more tasks than the current settings will allow, the task list is paginated.
The advantage of a table view is that tasks can quickly be sorted and skimmed. It’s ideal for working with custom lists, starting and stopping task timers, and updating tasks in bulk.
How does it work?
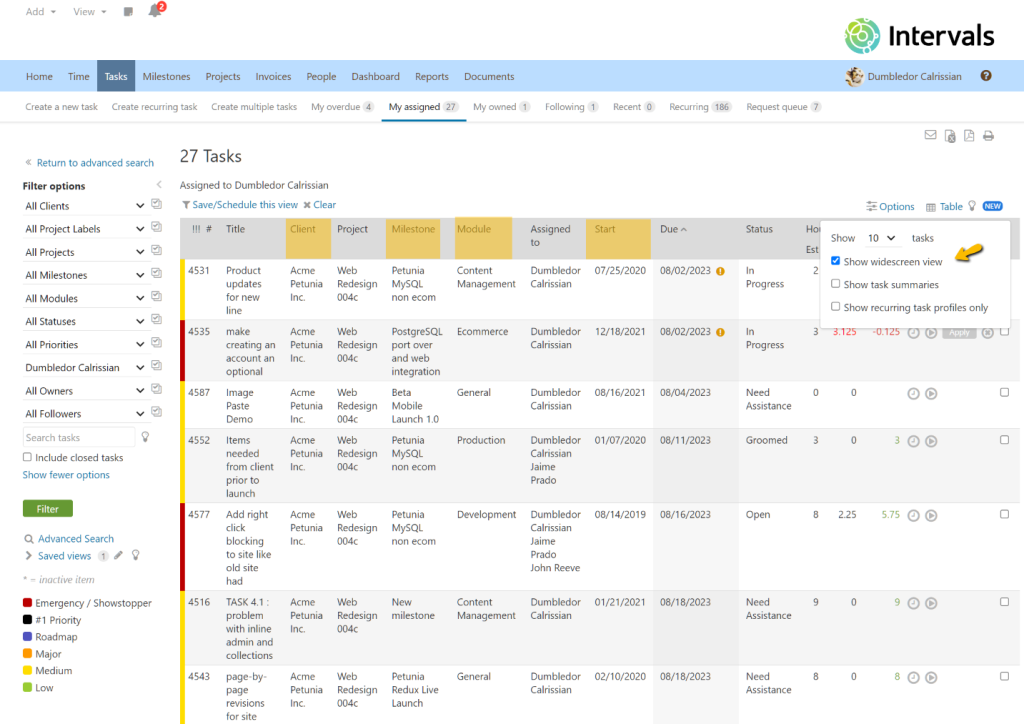
The table view of the task list includes tasks based on the filter settings in the left column. The left-to-right order and number of column headings is fixed, however, additional columns can be included by enabling the widescreen option. Click anywhere in the task row to open it.
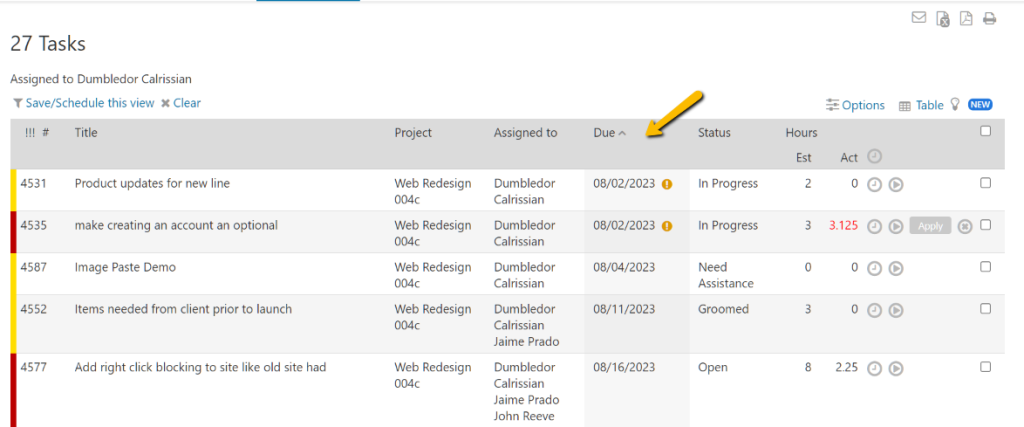
The sorting criteria can be changed by clicking on any of the column headings. Click on the column heading a second time to reverse the sort order. If there are multiple tasks that meet the same sort criteria, such as priority, tasks with the same priority will be sorted secondarily by their due date in descending order.
How to change between task views
To change from one task view to another, click on the Table/Card/Simple icon in the right corner just above the task list. Select the desired view to refresh the task list. Don’t worry about losing your work in one view when switching to another. Intervals will remember your last state in each of these views separately, enabling you to toggle through views seamlessly while managing tasks.
How to include more columns
The table has an option that will display additional columns. It’s called the widescreen view. To enable it, click on the “More filters” link at the top right of the task list, and check the widescreen view box. The additional fields it will include are highlighted in the screenshot below.
How to sort the task list
To order the task list, simply click on the column heading for the field to be sorted on. Click the heading a second time to flip the sort order from ascending to descending, or vice versa.
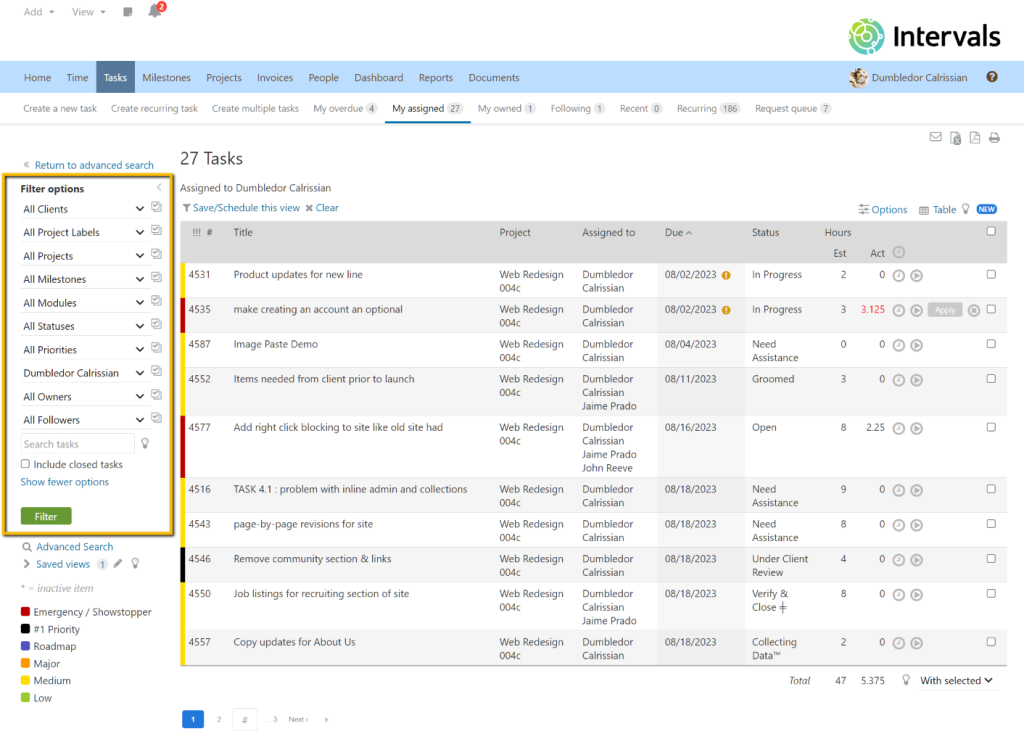
How to filter the table view
The filter options in the left column work the same as they do in card and simple view. Select any combination of them to control which tasks are included in the list.
Intervals will remember the last set of filters for each of the task views. This enables you to work independently in each task view, so you can manage tasks in the table view using one set of filters, and manage tasks in the card view with another.
How to save table views
Any time a list is created using the filter and sort options it can be stored in your list of saved task views. These are the same saved views that are available in the card and simple task list. Creating a saved view allows you to create multiple lists for managing different projects, milestones, and teams.
When the view is saved, Intervals also records the type of task list that was used. For example, if a view was created using a task table list, loading that saved view in the future will render the task list in table mode. Like other saved views available throughout the Intervals app, these can also be scheduled for recurring delivery.
How to create and update tasks
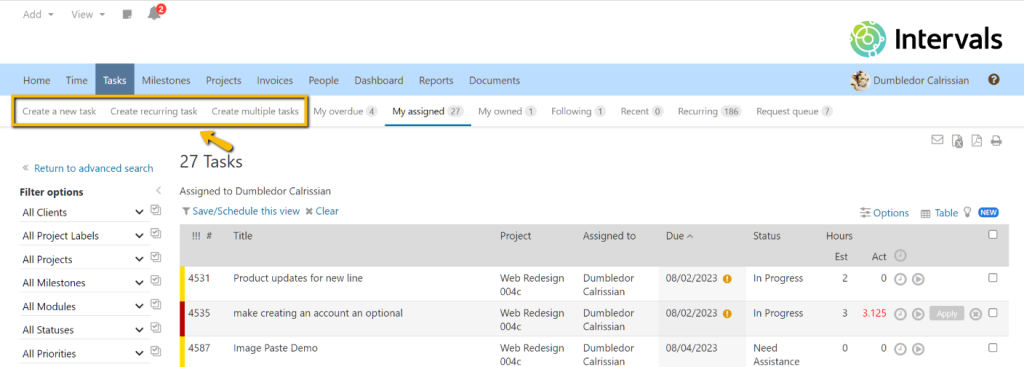
To create a new task, click on the “Create a new task” link in the task navigation bar at the top of the page. This option appears at the top of every page found under the Tasks tab. If the newly created task matches the current filter criteria, the list will be refreshed to include it.
Tasks can also be updated from the table view, just as they are in other views, by right-clicking on them. The right-click option can also be used for adding comments, time, and documents to a task.
Example use cases for the table view
Bulk update tasks
The ability to update multiple tasks at once makes the table view a powerful tool for high level task management. The bulk update feature allows you to change one attribute at a time across one or more tasks.
For example, in the event of a team member being moved to another team, a project manager could reassign all their tasks to a new person. In another example, all overdue tasks could be updated to escalate their priority. Be sure to filter the task listing by a single project to get the most out of bulk task updates.
Task reports
The task table view is simple and intuitive, which makes it an ideal tool for building and sharing task reports. Because the list includes assignee names and the total hours tracked, one use case is that a manager could create a list for each assignee and schedule them to be delivered daily. This way the team is apprised daily of their current task assignments.
You could also create a list for each project and save it. Then, load the saved task listing for each project on a weekly basis to skim ongoing tasks, analyze total hours, and gauge project health. The filter and sort options empower you to create an infinite number of custom lists.
Custom lists
The ability to create custom task lists makes for endless possibilities. These lists can be specific to a single project, or a team. Here are just a few examples of custom lists:
- Upcoming tasks starting next week
- Overdue tasks assigned to a team member
- Current consulting tasks
- High priority tasks that need immediate attention
- Tasks without any hours tracked on them
- Tasks due this week (via advanced search)
